
An LED wall is driven through a sending card, and the card shows only one rectangle of the media player’s HDMI picture. Your content is sharp and complete when three things agree: the wall’s size in pixels, the rectangle the card reads, and the area the player draws your designs into. This guide sets all three.
Good to know In easyCMS this is a setting of the screen in Studio, called Exact pixels. It works with the easyCMS Web Player today, and is coming with the easyCMS Android player 1.0.8 and the easyCMS player for Mac. The LED wall feature page has a live demo.
Why LED content goes wrong
Most LED walls do not have a TV’s 1920 × 1080 pixels. A shop-front wall might be 768 × 384. The player sends a full 1920 × 1080 picture, the card passes the top-left 768 × 384 of it to the wall, and the rest is never seen.
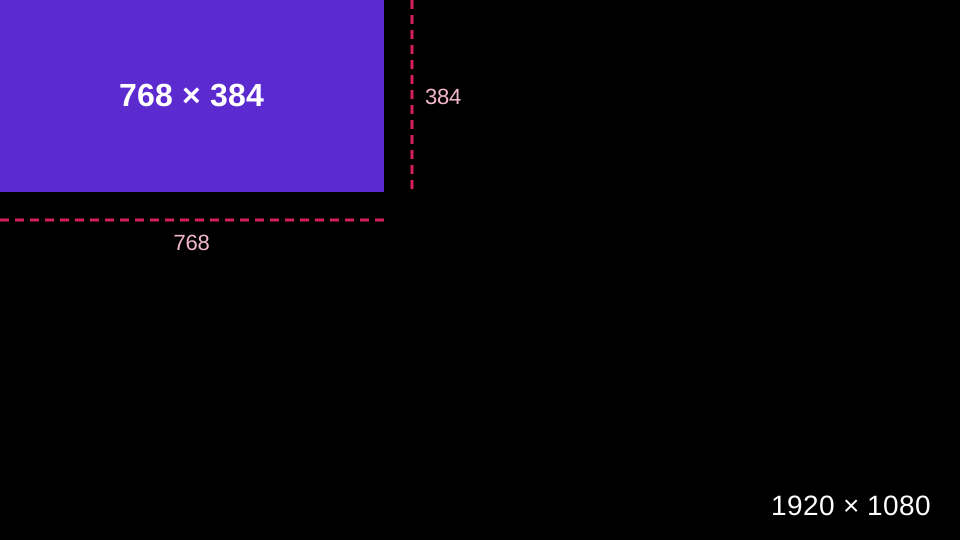
If the player draws your design over the whole picture, the wall shows only its corner. If something scales the picture on the way, edges land between LEDs and text goes soft.
| What you see on the wall | What causes it |
|---|---|
| Only part of the design | The player fills the whole picture; the card reads a corner |
| Black strips inside the wall | The player’s area is smaller than the card’s, or in another place |
| Soft, blurry text | The player box scales its picture, or a TV-style overscan shrinks it |
| Squashed or stretched logos | A video processor or the card scales the picture to the wall’s shape |
Step 1: count the wall’s pixels
Multiply the cabinets across by the pixels across one cabinet, and the same for the height. A 500 × 500 mm cabinet at 3.91 mm pitch has 128 × 128 pixels, so six across and three high make 768 × 384.
The cabinet’s data sheet gives its pixels. Without one, the LED wall calculator works it out from the cabinet size and pitch. Write the two numbers down: everything below uses them.
Step 2: set the player’s output
The player’s picture must reach the card unscaled.
- A computer (Windows PC, Mac, Linux): set the display output to 1920 × 1080, or 4K for a bigger wall. Windows display scaling and Retina screens are fine: easyCMS counts real pixels.
- An Android box: set the box’s HDMI resolution, and its screen zoom or overscan to 100%. Many cheap boxes draw at 1280 × 720 and scale up. From Android player 1.0.8, Studio’s screen page will say whether yours is pixel-exact, and on boxes that allow it, fix it with one button.
Step 3: set the sending card’s area
Open the card’s software on a computer connected to the card: NovaLCT for Novastar, LEDVISION for Colorlight, LEDStudio for Linsn. Find the setting for where the wall’s picture starts in the input (often called the start point or offset) and its width and height.
For most walls, start at 0, 0 (the top-left corner) with the wall’s width and height, here 768 × 384. Leave brightness and calibration as your LED installer set them.
Step 4: set the same area in Studio
- In easyCMS Studio, open My screens and the screen that drives the wall.
- Under Screen size and position, choose Exact pixels.
- Type the width and height (768 and 384) and the position: From the left and From the top, the same as the card (0 and 0).
- Press Save size.
The player draws your designs into exactly that area, one pixel on one LED, and keeps the rest of its picture black. The screen follows at its next check-in, without a restart.
Step 5: design at the wall’s size
When you save, Studio makes the screen’s designs again at the wall’s size, and new designs for that screen start at it. A design you gave a custom size of its own keeps it, and Studio tells you.
For a design you build yourself, choose Custom size… above the preview and type the wall’s pixels. LED walls are seen from far away, for a few seconds: big text, dark backgrounds, few words. Our 13 tips for LED content go further.
Step 6: check it on the wall
Stand back and look at the edges. The first and last rows and columns of LEDs should show the edges of your design, with nothing missing and no black line. Text should have hard edges, with no half-lit LEDs around the letters.
- Cut off on one side: the card and Studio have different positions. Compare the From the left and From the top numbers.
- Black line along an edge: one area is a few pixels smaller than the other. Compare the width and height.
- Still soft: something still scales. Check the box’s zoom or overscan, and that the card is not set to scale its input.
Which players can do this
| Player | Exact pixels |
|---|---|
| easyCMS Web Player, in Chrome or Edge on any computer | Yes |
| easyCMS Android player | Coming with Android player 1.0.8 |
| easyCMS player for Mac | Yes, when it is released |
| Samsung Tizen, LG webOS, Xibo’s own players | No: designs fill the screen |
A Windows PC is a common choice beside an LED wall, because it can also run the card’s software. The Web Player runs on it in Chrome or Edge, with nothing else to install.
A wall driven by one player is one screen in easyCMS: one display licence, whatever its size. See pricing, or book a demo and tell us your wall and card.